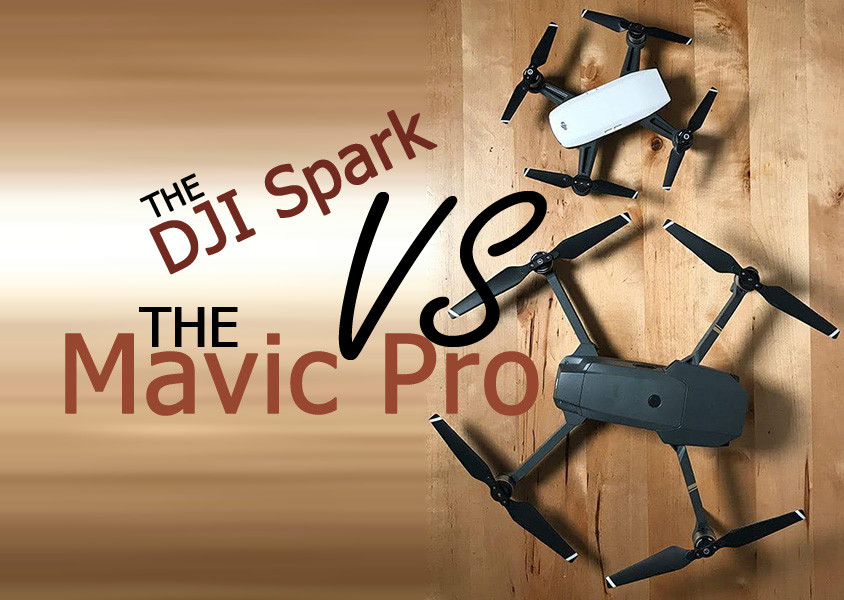
Getting the perfect aerial photography with a drone used to be exclusive to actual professional photographers and movie videographers, but no more! With the recent advancements from the like of DJI, a semi professional or even an enthusiast can afford to get a Mavic Pro
or a Phantom 4
at a very reasonable price. Even the cheap refurbished DJI Phantom 3
can produce great looking images and videos; the secret then lies with the operator of the drone. That is YOU! 🙂 But do not worry, there is an easy solution for that.
Having the latest and greatest equipment is not enough, you need to have a pretty good idea of what to do with it to get that perfect aerial photography, and this is where we come in. In this short article I will give you some quick and dirty tips for the getting the perfect aerial photography, so let us get to it.
Contents
Images used above are taken from www.dronestagr.am 2016 photo contest.
Drone Aerial Photography Tip Number 1, Shoot in RAW

Every professional photographer doing any kind of photography using any type of camera be it DSLR or an action camera or even a built it drone camera will tell you to always shoot in RAW format. This gives you the ability to use your computer later on to do all the editing you need in terms of correcting the exposure or adjusting the colors.
Of course, this means you will need to get a bigger memory card, but believe me it is well worth it. Save in JPEG format after you are done with the editing.
You should do this even if you are only shooting for fun because you never know when that moment of genius strike and you shoot the perfect photo!
Drone Aerial Photography Tip Number 2, Use Bracketing
Not all cameras support this option but if your does then you need to use it. What bracketing does is it makes the camera record more than one instance of the same photo using different exposure settings. This is extremely useful in two cases. First, if you did not choose the proper exposure or ISO setting for your photo then the end result might be too dark or too bright, with bracketing this is eliminated because when you have 3 or even 5 levels of brightness to choose from then you are sure to have the perfect setting. Second, combining those several exposures allows you to make HDR photos from your images, which brings out more details from the images in both the dark and the extremely bright spots of the image.
So to get this kind of HDR photo or Rome

All these images were combined and balanced

Drone Aerial Photography Tip Number 3, Shoot in Manual

If you are not really accustomed to the settings of the camera and what you need to use, then you should stick with the auto mode until you really figure things out, otherwise you REALLY should use the manual mode. To help you get the proper settings start off with the automatic mode and see what the camera thinks is best for your current scene and go off from there to get the perfect style you want.
Drone Aerial Photography Tip Number 4, compensate for wind effects

All drones regardless of how sophisticated they are will be affected by the wind conditions. And as you know, the higher up the drone goes the windier It gets, which means even more shaky images. This can be easily contracted by using a fast shutter speed, which will remove the blur effect completely. This is all great in the day, but at night things get a bet more complicated. Taking photos in the dark requires you to use long exposure settings to allow for more light to the sensor, this will undoubtedly produce shaky images. So what you need to do is experiment with the best shutter speed. Your best bet would be to try to shoot in a calm night in the first place but if you have to shoot in a somewhat windy conditions then shoot several photos with the slowest shutter speed that gets you good results.
Drone Aerial Photography Tip Number 5, Pick low ISO setting

Similar to tip number four above, ISO also plays a major role on the quality of your images. But instead of shaking ISO will reflect how sensitive the sensor is to light. Using high ISO values will increase the sensitivity meaning you can use faster shutter speeds while still getting bright enough photos. This however is not all perfect, higher ISO settings mean that the photos will noise and grain.
During the day when the sun is nice and bright pick the lowest ISO setting (which is usually 100) to get the best possible images, but when shooting in the dark you will have to experiment with the ISO setting and the shutter speed to get the best compromise between the two to achieve the best photo quality.

And remember, wind is variable, so before increasing the ISO try with longer exposure times several times, maybe you can get lucky enough to get that perfect photo when the wind calms a bit.
Drone Aerial Photography Tip Number 6, Use Filters
 There are two types of filters
 you need to consider for your aerial photography. The first and most common one is the polarizer
. This is essential when shooting in daylight around the city because it greatly reduces glare from the sun reflecting off buildings and car’s windshields. The polarizers lens also helps increase color saturation for a livelier photo.
Note here that there are some polarizer filters, which are dark, this is useful in daylight because you can use those and increase the shutter speed resulting in some nice effects without over exposing your photos.
The other types of lens filters you should consider is the neutral density ND filters. These are highly recommended when shooting videos. To get the cinematic effect on your aerial videos it is recommended that you set the shutter speed to twice that of the frame rate you are shooting with.
For example, if you want to shoot a 24fps video then the shutter speed should be at 1/48 second, but because this does not exist you should choose the closest setting to that which is 1/50 second. Using such a slow shutter speed in bright daylight will over expose your images and to counteract this an ND filter will reduce the light coming in to the sensor producing great looking images.
A neutral density filter can also be used to darken the sky a bit making your photos that much nicer. However, of course this can be achieved through post editing so it is not really necessary.
But note that when you shoot in the dark you need to take the ND filter off as it reduces the light coming in to the sensor.
Drone Aerial Photography Tip Number 7, Post processing

As we have discussed earlier, you need to use your computer to edit the photos produced by your camera or drone regardless of how good it looks because there is always room for improvement. You do not need to be a professional graphic designer or video editor to be able to enhance your photos, Adobe Photoshop for example has an auto level mode, which is quite decent in giving you a more balanced color for your photos. And of course, you can use it to crop and rotate your images appropriately and even combine different bracketed images into HDR. If you cannot afford Photoshop or Adobe Lightroom then there are other cheaper options, personally, I love ACDSee for managing my images and doing some quick touchups.
Drone Aerial Photography Tip Number 8, Get Creative

Drone photography has opened the floodgate on the possibilities of making photography and videography. You are no longer bound by the physical limitations of access and not being able to get to the perfect spot, so go ahead, experiment, be creative, try new angles and do new things and literally take you photos to the next level.
Drone Aerial Photography Tip Number 9, Know your Drone
 Things do not always go as planned, so you REALLY need to “be one” with your drone. Always do a preflight check of your drone and your equipment. You need to check your calibration, things like compass can go off when moving from place to another. Even if you are experienced pilot do not get your drone as high as possible as soon at it is airborne, takes it easy and hover around a bit to make sure everything is working as it should.
Finally be mindful of your surroundings, be it other people, property or even wildlife that is around, and always fly safe.
So there you have it, these are the best and easiest tips to get the perfect aerial photo by a drone. Now it is back to you, show me your best shots and share you favorite tips!
- DJI Mavic Pro Vs DJI Spark VS DJI Phantom 4, which is the best DJI drone to buy? - September 28, 2017
- 9 Super Easy To Follow Tips For The PERFECT Aerial Shot Using A Drone - January 1, 2017
- How to Build Your Own Drone? And Should You Build a Drone? Part 2 - December 19, 2016


